New visitors: the updated DIY tilt-shift lens tutorial is here:
http://cow.mooh.org/projects/tiltshift.
In it, I've got a comprehensive guide to how tilt-shift works, along with a guide to using existing 35mm lenses to build DIY tilt-shift lenses.
On the weekend I finally got organized and with some help from
Briony we finished attaching a male EOS adapter on to a toilet-plunger - because, lets face it, there isn't any more productive activity than affixing low-end plumbing equipment to high-end optics :P From certain angles, it looks totally badass. From most angles, it looks like a toilet plunger. The whole thing was built for less than US$25, so I can't really complain.
My previous attempts at tilt-shift have ranged from
pure fakery to some
fairly decent results achieved by holding a prime lens a little away from the camera body and simply just tilting it. However, this was a fast path to getting dust and grime in the camera body, so I started to seek out a closed solution.
One key disadvantage of using a 35mm prime lens for tilt-shift is that the
flange focal depth of the lens means that it has to sit right next to or even
slightly inside the camera body to get a picture. However, by using a medium format lens, which has a longer flange focal depth and a bellows arrangement, you can afford to move the lens about a bit more. Two people who've championed this technique (and used a plunger as bellows) have been
Dennison Bertram and
Keith Loh, from whom I draw my inspiration for this project.
For this particular implementation, I wanted a fairly strong, permenant solution that would still allow me to swap out the lens at end of the bellows. My materials list was:
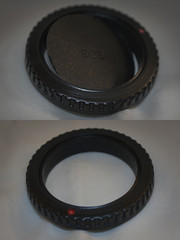
I first used a hobby knife to make an aperture as large as possible in the body cap; this was going to be the EOS mount for the plungercam.
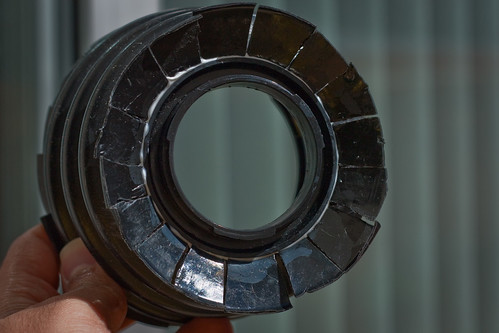
I lopped the head and tail off the plunger; the smaller end had a diameter to match that of the body cap, and the larger end that of the lens. Here you can see where the male EOS adapter was attached. I was aiming to do this completely without screws or glue, but I ended up needing to glue the adapter into place to make a secure fit.
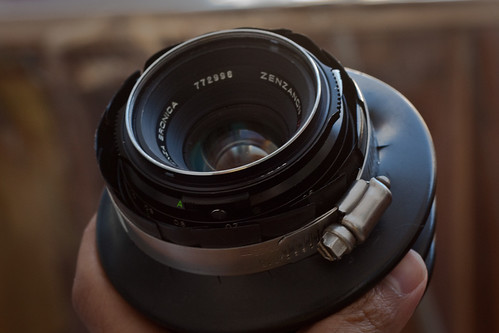
The lens is held into place by slotting into the end of the plunger, into a flange made up of tabs cut from the end of the plunger plastic. A screw-clamp is put around the lens and the tabs so it all holds together, which is seems to do quite securely.
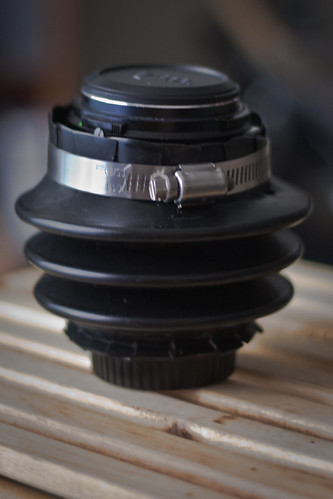
I was a bit worried that the lens would bend the plastic and would need constant holding. However, the plunger is relatively stiff, and I feel fairly confident that the lens mechanism holds up under its own weight without flopping about dangerously. And there you have it - probably one of only a few toilet plungers in the world that come with an EOS mount.
Once you work out a way of holding the lens comfortably, it's pretty easy to tweak the focus of the lens. It's quite sensitive to position, and the rubber is fairly stiff, so I it's not advisable to use it for long-exposure shots. Also, the lens completely and utterly throws out spot metering. The fix is to switch back to evaluative metering (bah! humbug!) and underexpose the image a little (one f-stop seemed to work for me); this way you can merrily shoot in aperture priority mode without having to constantly tweak the shutter speed.
But does it take decent pictures? I did a field test with it yesterday, and I've included some highlights below (click on the images to see larger versions). It's still early days yet with this lens, but I'll leave the quality judgement up to you.

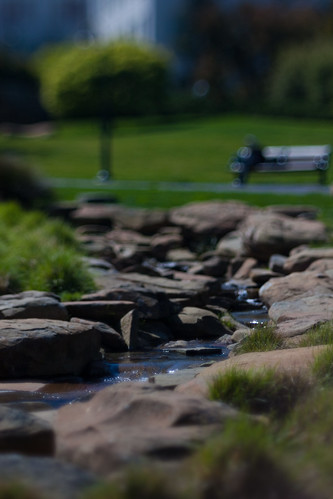
Here the lens really shows its lovely shallow depth of field. From the tests so far, I really do think it's ideal for portrait and macro shots as opposed to trying to miniaturise cities.

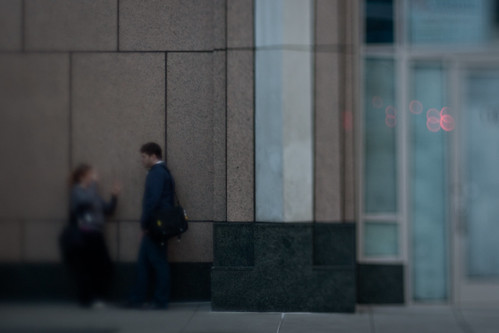
Later on in the day, after a bit of practice, it became pretty easy to select a target to focus on in the image.
Another tilt-shift artifact - bright lights (see reflection of tail-lights in the window on the right) become big, fuzzy bokeh highlights. This might be a boon for some, but maddening for others.
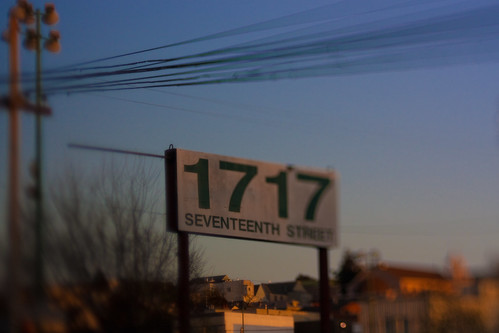
I really love what real tilt-shift does to parallel lines in the image - what seems to happen is that the blur increases as you move away from the focal plane.
See some of my other DIY projects (plungercam 2, iPhone SLR lens adapter, papercraft etc)
here.