27 July 2009
Plungercam 2: cheaper and more predictable :)
New visitors: the updated DIY tilt-shift lens tutorial is here: http://cow.mooh.org/projects/tiltshift.
In it, I've got a comprehensive guide to how tilt-shift works, along with a guide to using existing 35mm lenses to build DIY tilt-shift lenses.
[Edit #0: hi to everyone from hackaday, crunchgear, makezine, lifehacker, and wired! And Photojojo too :)]
[Edit #1: Some new results with Plungercam 2 here; earlier video experiments with tilt-shift here and here.]
[Edit #2: Those who are looking for the reasoning behind the project and details on how to get parts might want to check out the write up for the original plungercam first.]
[Edit #3: Need a tip with building the plungercam? Want to collaborate on a project? Don't hesitate to drop me an email]
[Edit #4: See some of my other DIY projects (plungercam 1, iPhone SLR lens adapter, papercraft etc) here]
The original plungercam that I built earlier this year has been an absolute joy to use. However, the original design has a couple of problems.
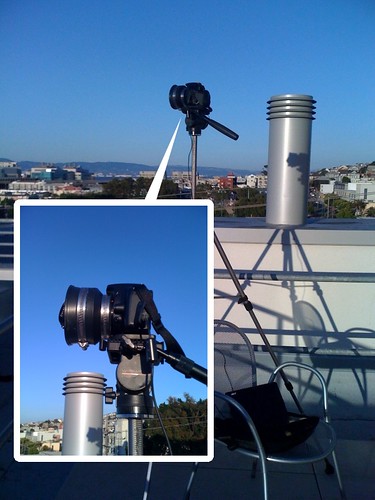
1) The mounting mechanism to attach it to the camera uses a plastic body cap, which was never designed to hold much weight. As a result, the teeth on the cap have been slowly disintegrating under the weight (see inset, above). Mounting the lens has now become pretty unreliable.
2) Usage - there is a lot of fun to be had by forcing the user to tweak the focus by hand, meaning zero repeatability - no two plungercam shots will ever be the same. However, this means that it is unusable for time-lapse video applications, where it is important to keep the lens in the same place between shots.
I'll go through the construction of the dead simple Plungercam 2, which addresses the above two issues. It's worth pointing out at this stage that this is the first step in getting the plungercam to behave like a proper tilt-shift lens. Currently it only really handles tilt, so, strictly speaking, it's role is more like a very quirky selective focus mechanism than actual perspective correction.
Plungercam 2 keeps in the spirit of the original plungercam by using cheap plumbing equipment and affixing it to precision optics. This iteration eliminates the need for glue altogether, so all the optical components can be easily taken out and re-used elsewhere.
The main component is a rubberized pipe coupling, which I got for $7 at the always awesome Center hardware. The two adjustable steel bands will be used to hold the mount and lens securely in place. This particular one is two inches on the narrow end, and three on the wider end.
To fix the problem with the body cap mount teeth fraying, I decided to replace it with a T-mount T-mount adapter. I picked up the one I'm using for $3 from one of the closing Ritz camera stores.
I'm re using the $12 (from ebay) Zenza bronica medium format lens that was in plungercam 1. Since this was only held in place using a metal clip, it was easy to take it out and re-use it.
Total cost: ~$22 :)
The narrow end of the pipe connector is going to be connected to the camera; to maximise the usability of the lens, we want the narrow end to be as short as is practical. The general idea is to put the t-mount adapter into the narrow end, and to use the pipe clip to secure it into place.
Slide the pipe clip as far along as it can go along the connector, and score using a hobby knife around the edge of it that is going to be attaching to the camera. Remove the clip, and cut along the score line (again, a hobby knife will do the job here) to chop off the top of the connector. Keep the cut as perpendicular to the surface as possible.
My T-mount adapter was a little than two inches on its external diameter, and the connector itself is designed with a two inch fitting on its narrow end. With a bit of careful levering, the adapter can be wedged into the connector. Whilst it is a good fit, it's a good idea to put the pipe clamp back on and screw it tightly into place. Last thing you need is the adapter falling apart when it is on the camera :P
To finish the adapter, place the lens inside the wide end of the connector, and adjust to get the tilt desired. To fix it into place, simply tighten the screw clip. To reposition, loosen the screw clip, mess about with the lens position, and try again.
The design works because the mount is rubber, and the lens size is just a little less than the diameter of its mount. The lens sits comfortably in the mount, and the adjustable rubber gives it room to move when you want to tilt it. The metal clip (when tightened!) ensures that the lens can be held in place. The field tests that I've done so far have shown that the lens is indeed held pretty solidly in place.
The main drawback is that it's not as interactive as plungercam 1, and it takes much longer to set up a shot. On the other hand, you can definitely use it for time-lapse captures, which was a goal of mine.
It's definitely still a work in progress (I still need to add a rack to more precisely control lens shift as well as tilt), but results so far are not too bad :)
link to video
Subscribe to:
Comments (Atom)


